Mel heard me waxing lyrical about my Galaga prowess in the 80's and decided one day to buy me a joystick from China which connected to a computer and allowed me to play Galaga as a present. Well in the excitement of the game I destroyed said Chinese joystick in about 2 days. She decided I needed a more robust gaming experience so she found this old arcade machine on eBay and said "go on, fix it up". Hmmmmm.

We got it from a bloke in Castle Hill but we still needed a trailer to get it home. It weighs about 100Kgs so it’s a beast and not easy to move around.
I decided to build a MAME machine. What's that? MAME stands for “Multiple Arcade Machine Emulator”. MAME is a technology that runs on any standard PC (or even Linux) and can run all the old games from the 70's, onwards. All the classics like Space Invaders, Galaga, 194x, Defender, Bomber Jack....the list goes on. Go to this site to get MAME. Go to this site to download any game you would ever want and play it with MAME.
My plan was to convert this classic cabinet to MAME but to make it otherwise look and work exactly as the old machines. The benefit is that the cabinet will be able to run 1000's of games and it will be easy to maintain - it’s just a PC after all.
This is the story of what I did to it over the last 4 months.
First thing I did was gut the cabinet and throw away pretty much everything.

I also broke down the top half because I wanted to stick a new LCD monitor in there.
I obtained this old computer (1.7GHz, 512MB RAM, 20GB disk) which was about to be thrown out at work ...

...and pulled the guts out of it, re-mounted the power supply and hard disk onto the side panel of the original PC’s cabinet.....

....then mounted the computer onto the left side wall of the cabinet

I replaced all the old buttons and joysticks with new ones (cost $49) and installed a KeyWiz keyboard encoder ($70) which turns the switches and joystick signals into keystrokes as if there was a computer keyboard attached. The MAME software is looking for these keyboard keys and uses them to control the games.


Sound is very important with an arcade gaming machine. I happened to have an old surround sound system in the garage so this made a splendid addition to the cabinet. I mounted the subwoofer/amplifier into the bottom and placed the rear left and right speakers on the sides. Later I installed the front left and right and centre speakers in the top half of the cabinet.


Now for the display (Monitor). This presented the biggest challenge mainly because I didn’t really have a good plan for mounting the LCD into the cabinet. I had 2 ½ attempts at mounting it securely before finishing on a design that was not the right one, but it worked in the end anyway.

I fabricated the mounting brackets above and a close up below.

The correct way to mount the monitor, in hindsight, would have been to use the existing wall-mounting facility on the back of the LCD monitor and have two brackets that attached to the surrounding MDF frame. But we live and learn!
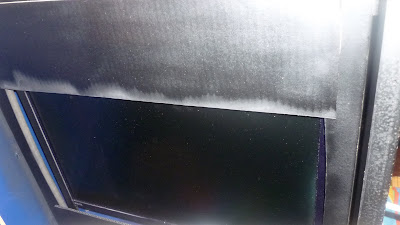
I had previously pulled the top half (which housed the original monitor / display) completely to bits. Some of the front-facing surrounds had to be re-sprayed matt black. These are behind tinted glass so they don’t have to be perfect, just black.

Now for rebuilding the top ½ of the cabinet


I made a couple of cardboard sides to cover the gaps and painted these matt black as well. They look a bit sus here but when behind the tinted glass they are completely black and you can’t see any features.
Finally! The top ½ back on top of the bottom half! I needed help from Mel and Jesse a couple of times to get it aligned and bolted down. It weighs a ton.
Then I mounted the three surround sound speakers into the top cabinet.


